
How to Check the Disk Space in Ubuntu? (Updated)
It’s quite an essential aspect of having a drive or disk that you need to check the space available in it. There are times when you’d suddenly be given the warning that there isn’t any more free space in the drive or disk, so it’s always better to check this from time to time. For instance, if you wish to add a new app or software to your mobile, laptop, computer, or Linux server, then your foremost task should be to check the disk space.
In this article, we’ll cover the various ways in which you can check Ubuntu disk space to avoid the issue of low space warning.
Ways to Check Disk Space Ubuntu
As I mentioned earlier, there are several methods that help Ubuntu check disk space, which inform you of the amount of free space left in the disk, etc., so let’s check them out.
1. Use the Terminal
If you use the terminal for this task, then there are du and df commands that you should know about.
Using df Commands
The df refers to Disk Filesystem or Disk Free and is already installed in Ubuntu 20.04, Ubuntu 20.10, and many other Linux operating systems. You can find information about numerous file systems in the df. Here’s how it works.
- Enter df in the bash terminal window and hit enter.
- The df command displays the space used and the space left in the disk. The space used is shown in percentage. In the picture below, /dev/sda5 is the actual disk in the system, and the disk information showcased is in 1k-block, making it difficult to figure out the output.
If you want a more valuable output, then instead of 1K block, enter -B, which refers to block size. To do so, input df, then after a space, enter -B and any letter from K, M, G, T, P, E, Z, or Y. These letters refer to kilo, mega, giga, tera, peta, exa, zeta, and yotta values from the 1024 scale multiple.
For instance, to see the disk usage figures in megabytes, input df -BM. There’d be no space between B and M.
- To understand the disk space information in simpler terms, use -h with the df command because it requires the df to use an applicable unit for each filesystem’s size.
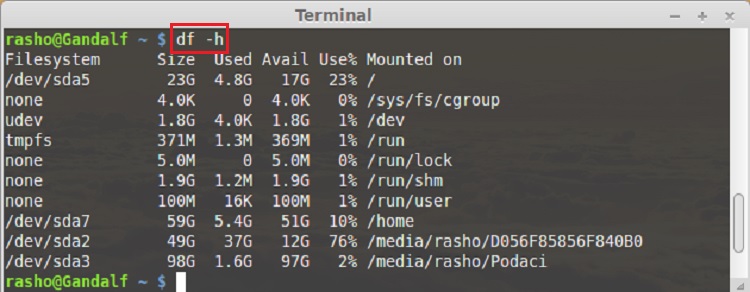
- When you use the df-h command, the disk space is displayed in GB instead of percentage. As you can see in the picture above, the /dev/sda file system is 29 GB in size, whereas the used space is 13 GB and the free space is 15 GB.
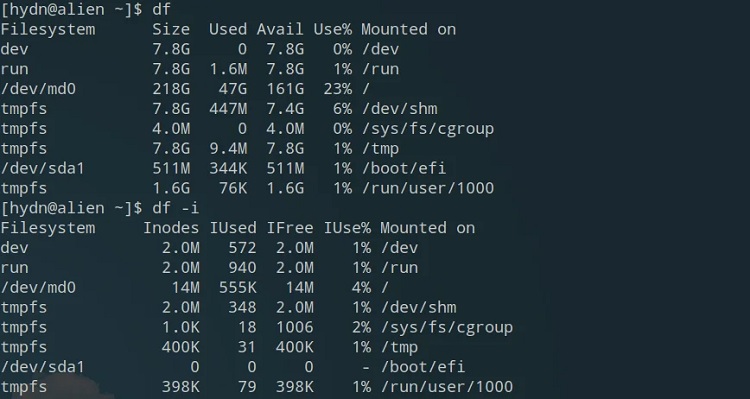
- Those who wish to see the information displayed in inodes should input df -i. The Linux filesystems use a data structure, inode, to store metadata about files and their descriptions, such as the name, modification date, position on the hard drive, etc., for every file and directory. Using this option is beneficial to system administrators at times.
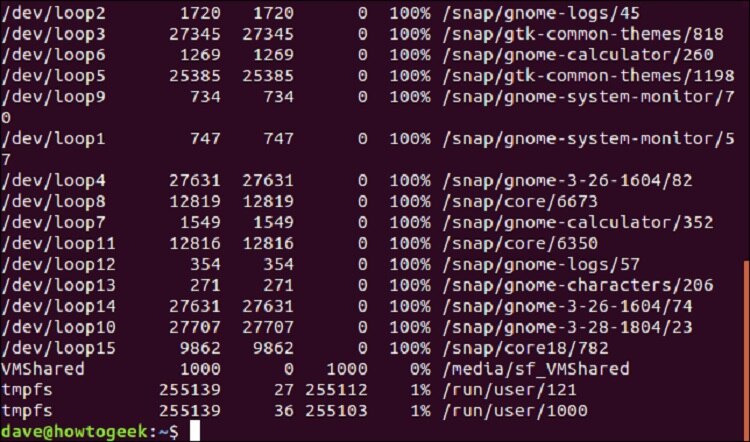
- The df provides information on all the mounted files; therefore, the entire display looks cluttered, as seen in the picture above. For instance, the /dev/loop entries in the picture above are pseudo file systems that appear as if they are a partition. Installing apps through the Ubuntu snap method would cause a lot of such mounted file systems to appear. The space mentioned in front of them would be 0 because they aren’t actually filesystems.
- Therefore, you can filter the file types you don’t want to see on the display by entering df – t, which refers to print type. It informs the df about the file types to include in the output.
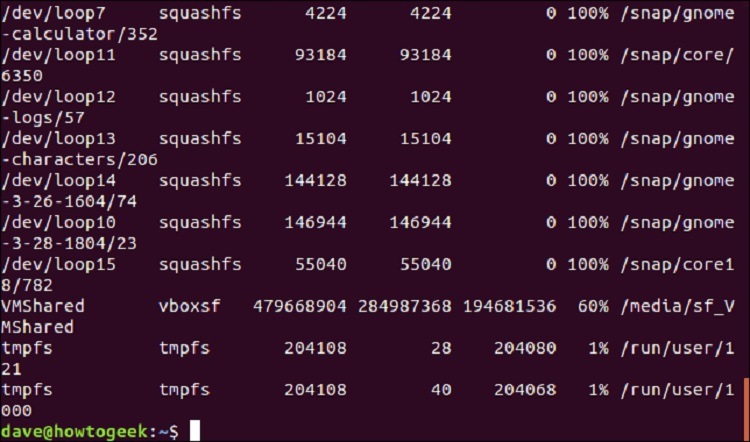
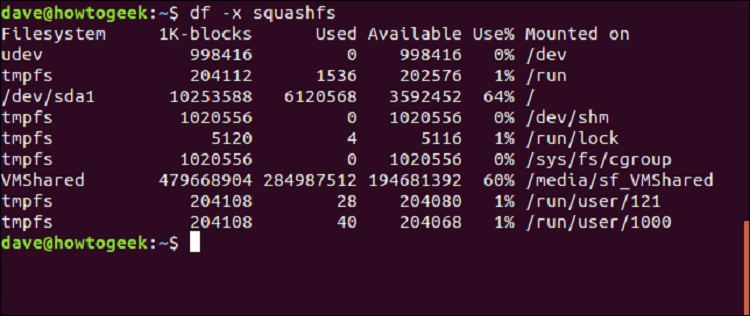
- In the picture above, you can see that the /dev/loop entries were all squashfs filesystem, so you can input df -x squashfs to exclude these files from the output.
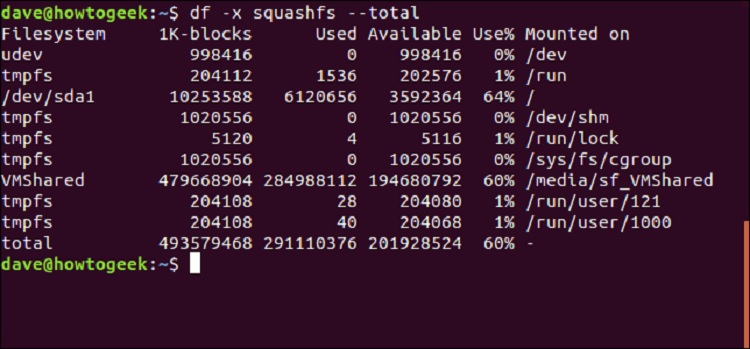
- You can also add a total option to get a total. Just input df -x squashfs –total.
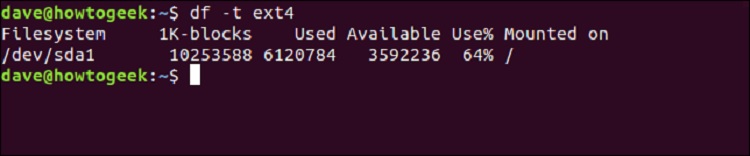
- If you want to only see a specific file type in the output, then type df -t ext4, where the t refers to type.
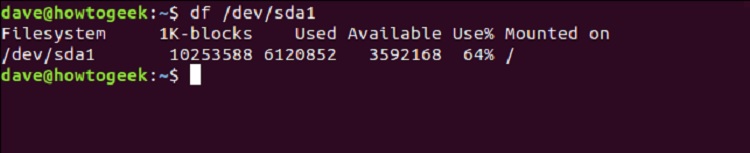
- You can also specify a set of filesystems that you wish to see by typing in their name. However, in the Linux system, the names of the files are alphabetical, so the first filesystem would be named /dev/sda, then /dev/sdb, and so on. If you wish to see the partitions in a single filesystem, then input /dev/sda1, which indicates the first partition of the file.
- There’s also a way to look at all the partitions in a filesystem by using *, which refers to any set of characters. On the other hand, the symbol ‘?’ refers to any single character. So the code would look like /dev/sda* to view all the partitions.
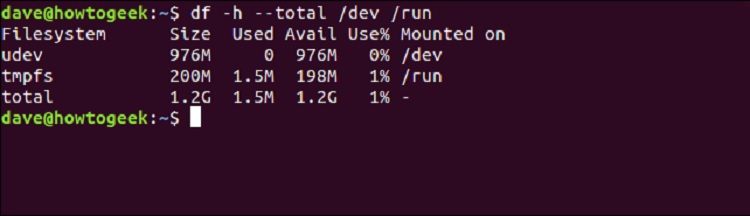
- Now, if you want a report of a set of named filesystems from df, where you require the sizes of the /dev, /run filesystems, and a total, then the code would look like df -h –total /dev /run.
- Here’s how you can use more such columns in the df to cater to your needs by using the — output option, along with a list of the column names separated by commas. There shouldn’t be any spaces in the comma separated list.
- source: The filesystem’s name.
- fstype: The filesystem’s type.
- itotal: The filesystem’s size in inodes.
- iused: The filesystem’s used space in inodes.
- iavail: The filesystem’s available space in inodes.
- ipcent: The filesystem’s percentage of used space in inodes, as a percentage.
- size: The filesystem’s size, which is in 1K blocks, by default.
- used: The filesystem’s used space in 1K blocks by default.
- avail: The filesystem’s available space in 1K blocks by default.
- pcent: The filesystem’s percentage of used space in inodes, in 1K blocks by default.
- file: The name of the filesystem if mentioned on the command line.
- target: The filesystem’s mount point.
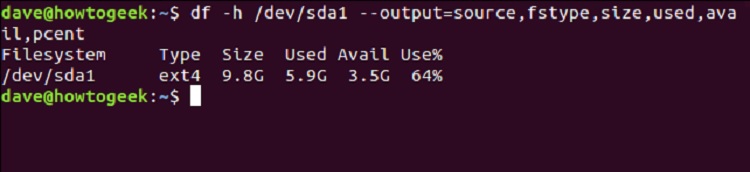
Now, if you want the df to give an output of the first drive’s first partition with readable content, along with columns source, fstype, size, used, avail, and pcent, then the code would look like –
df -h /dev/sda1 –output=source,fstype,size,used,avail,pcent
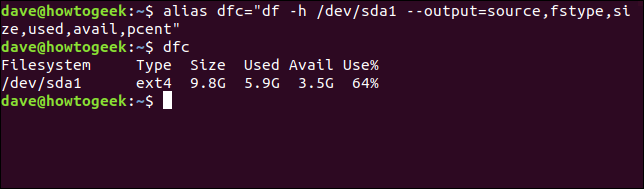
- You can also use long commands as an alias; for instance, an alias dfc, which represents df custom. So you can input –
alias dfc=”df -h /dev/sda1 –output=source,fstype,size,used,avail,pcent”
If you just type dfc and hit enter or input this whole command, the result would be the same. Add this alias to your .bashrc or .bash_aliasesfile to make it permanent.
- We’ve talked about how to get an output focusing on your specific requirements, but if you want the output to relay all the information it can, then input df -a –output, where a refers to all. The df would include all the filesystems, and the — output option without the comma separated list allows it to display all the columns.

- The last feature that this command offers is that you can input the less command, which enables the df to showcase the large amount of output it can generate.
df -a –output | less
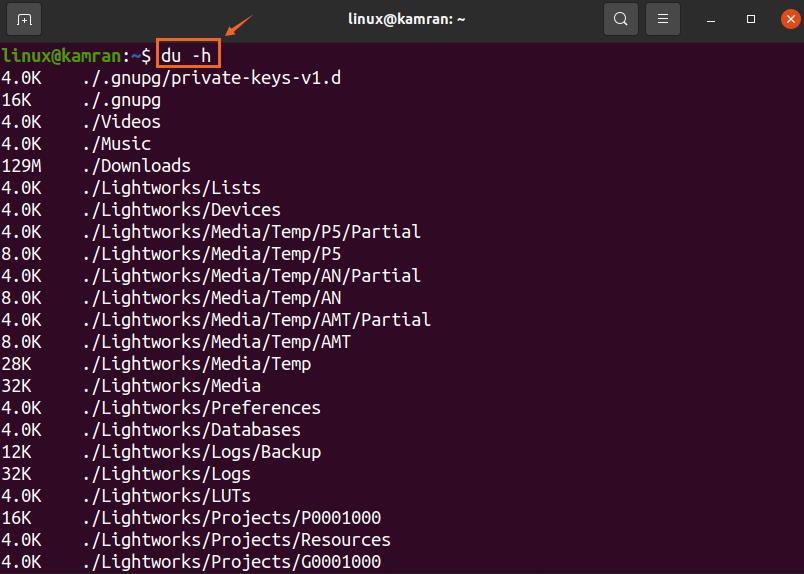
Using du Commands
The du refers to Disk Usage and displays the information about all the directories and subdirectories. The disk usage is displayed in KB and MB. Here’s how it helps you to check disk space Ubuntu.
- Use the code df -h -t ext4, which will inform you about the percentage of the disk that has been used, as shown in the picture.

- Using the du command, we can know which folder is holding more data. When you enter the du command with no other options, all the directories and subdirectories are displayed, and the information is mentioned in 1k-block. This list is quite long.

- If you want du to use some other block size, then input -B and choose any letter from K, M, G, T, P, E, Z, Y, similar to the way we did in the df command. So if you want the output in 1M blocks, then type – du -BM.
- You can again add -h with the du command to understand the information in a simple way.
- You can summarize this list as well by using the -s option, which would instruct the df to display the output of all directories except the subdirectories. So now, if you want a summarized output with readable information for all the directories, then the code would be – du -h -s.

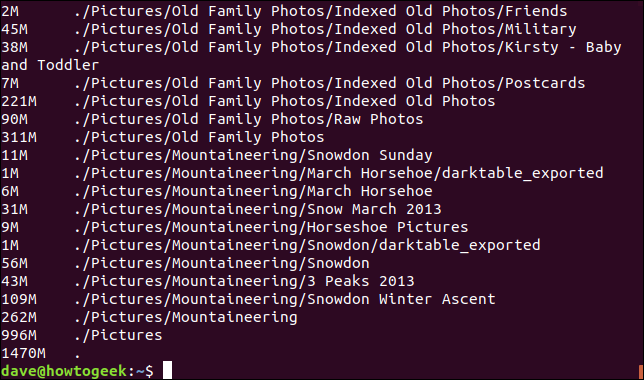
- As we can see in the picture above, the picture folder consists of the most data as compared to others, so the du command can sort these in descending order. Type du -sm Pictures/* | sort -nr to do so.

The meaning of the terms used in these df and du commands are as follows –
- Fileystem refers to the name of this filesystem.
- 1K-Blocks are the number of 1K blocks that are on this filesystem.
- Used refers to the number of used 1K blocks.
- Available term means the number of 1K blocks that haven’t been used.
- Use% is the amount of space used mentioned in percentage.
- File refers to the name of the filesystem if it’s mentioned on the command line.
- Mounted on indicates the mount point of the filesystem.
2. Use the Graphical Applications
If you’re using the Graphical User Interface applications, then it’s possible on Ubuntu 20.04 and 20.10. Here are the two methods to do so: Disk Usage Analyzer and Disks.
Disk Usage Analyzer –
- Open the Application Menu and look for Disk Usage Analyzer Application.

- Click on this icon to open it. The actual disk would appear, indicating the “Available” and “Total Space.”

Disk Utility
Ubuntu 20.04 and 20.10 has a pre-installed disk GNOME utility. Here’s how to use it.
- Go to the Application Menu and search for Disks.

- The disk utility displays the total size and free space available in the disk.

Faqs
How much disk space do I have Ubuntu?
If you wish to use the System Monitor, then go to the Activities Overview and open the System Monitor Application. Click on the File Systems tab to look at all the partitions and to check disk usage Ubuntu. The information would display the total space, used space, and available space. You can also use df and du commands to know how much disk space is left and which folder contains more data.
Conclusion
We hope you now know how to check Ubuntu disk space and that this guide helped you in understanding all the steps you need to follow for the same. We understand that it might be a lot of jargon for some people, but you’ll get used to it and become more attuned to what is being instructed in the steps above.


