
Free Up Space on Your Mac in 2024: The Latest and Greatest Tips (Updated)
The majority of Mac users have faced this issue once in their life, at least when their hard drive or disk gave them a scare by notifying them of the low space on their device, especially since the hard drives were replaced by SSDs that are limited in storage capacity. So if you store too many photos, videos, and other files than it can handle, it’d show the not enough space error to you. You should have at least 15% free space at all times; otherwise, the device will start slowing down and hampering your functioning.
Now the question is how to avoid this problem and how to clear space on Mac? Well, we have listed a few ways for you to try out whenever you’re running low on space that would help you keep your device in the best condition.
What Are System and Other?
If you have the older version of macOS, you might know that if you wish to check what is taking up storage space, it just says “System and Other.” In new versions, it’s labeled as macOS instead.
Most of the time, the Other takes up almost 40 GB of your space, and you have no idea what this “Other” consists of. So most of the people assume that the files in there would be worthless and can be deleted. That’s not always the case, though. The same goes for “System” as well; you should be careful about what you’re deleting from the device.
You can delete some of the items, such as iOS backups, Time Machine snapshots, and so on, from the system.
How to Clear Up Space on Mac?
Before we move on to the methods to clear storage, let’s know how to check how much space you have in the hard drive or disk.
- Go to the Apple Menu and select the About This Mac option.
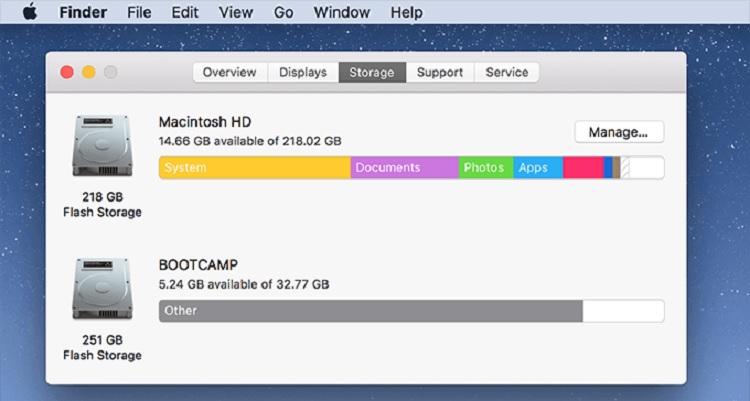
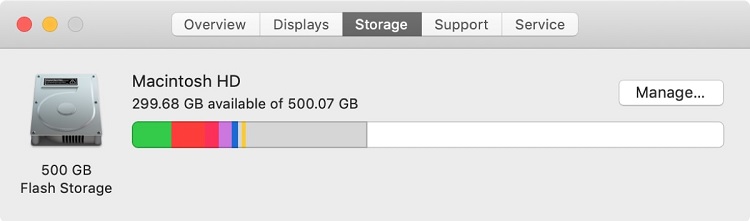
- Click on the Storage tab and wait for a few seconds. Then, you’ll see a storage bar with different colors.
- The gray colored part of the bar shows the free space available, so hover over it to know the amount of space you still have.
The moment your storage capacity fills up to 85%, the computer will start facing issues and causing errors.
Now, let’s understand how to free up disk space on Mac in the most straightforward ways possible.
Optimize Mac Storage
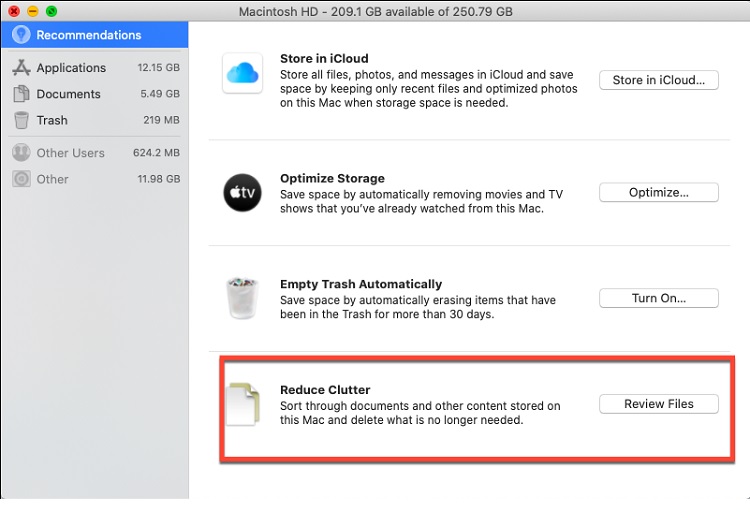
Mac has a built in optimization tool, and you can find it above the Storage Bar by clicking the Manage button. There are 4 options available under this tab, and they are as follows –
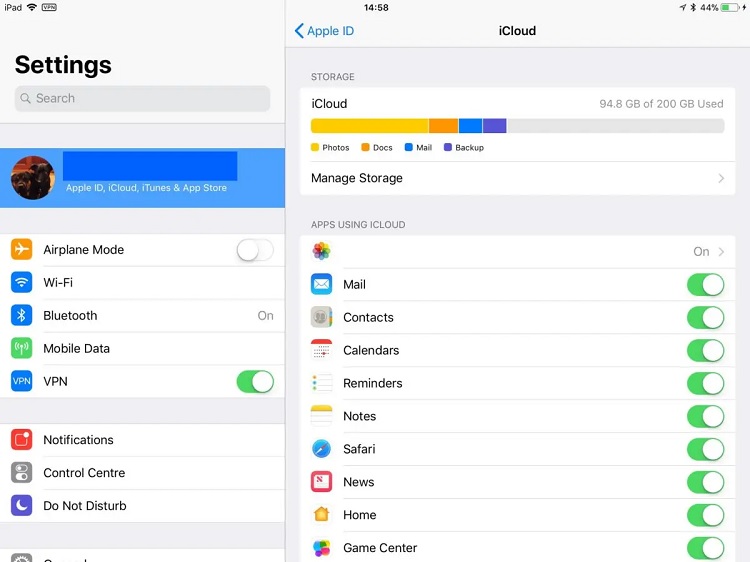
1. Store in iCloud
This option allows you to store all the files, including photos, videos, etc., in iCloud. This way, you can keep only the absolutely necessary files on Mac and free up space as well. The free version of this allows you to store 5 GB of data, while the paid version will offer you 50 GB, 200 GB, and 2 TB worth of space.
- Under the Apple menu, click on System Preferences.
- Select Apple ID.
- Click on iCloud.
- Tick the box beside Mail.
2. Optimize Storage
Click on the Optimize button, and the device will remove movies, tv shows, and other files to the trash on its own whenever the storage is low.
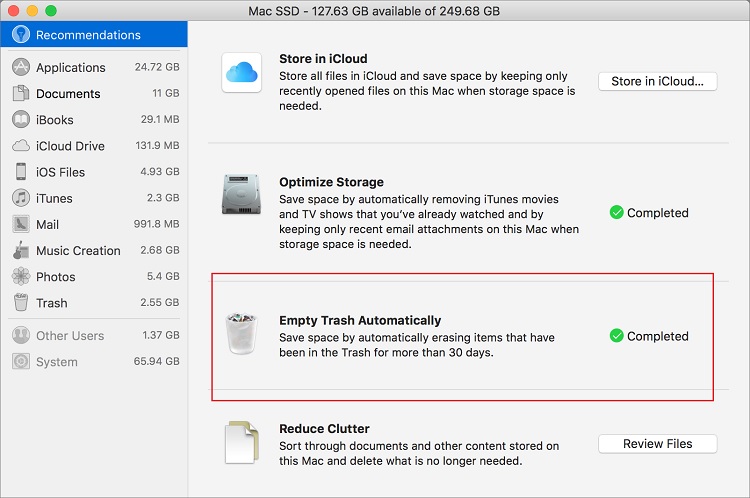
3. Empty Trash Automatically
The items that were in the trash for more than 30 days would be deleted permanently by the device.
4. Reduce Clutter
The Review Files button on Mac allows you to organize the files and get rid of the ones you no longer need.
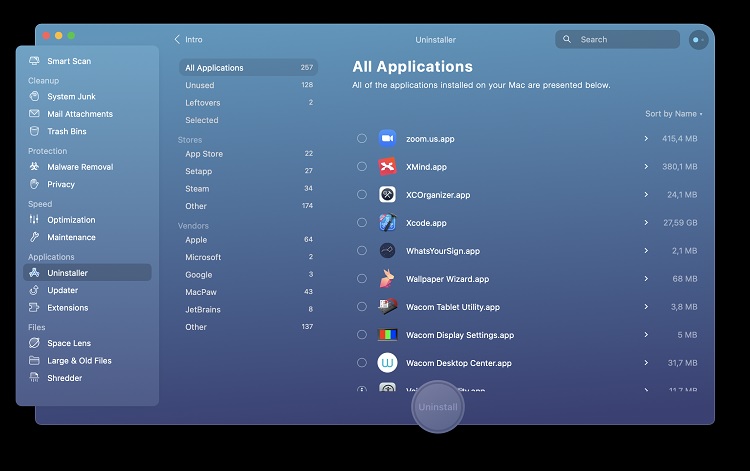
Uninstall Unused Apps
Sometimes we download apps but use it rarely or never, so these applications are only taking up space for free, and it’s better to delete these. You can either uninstall these manually or use a tool.
- Navigate to the Finder and click on Applications.
- Drag an app to the trash.
- Now, empty the trash.
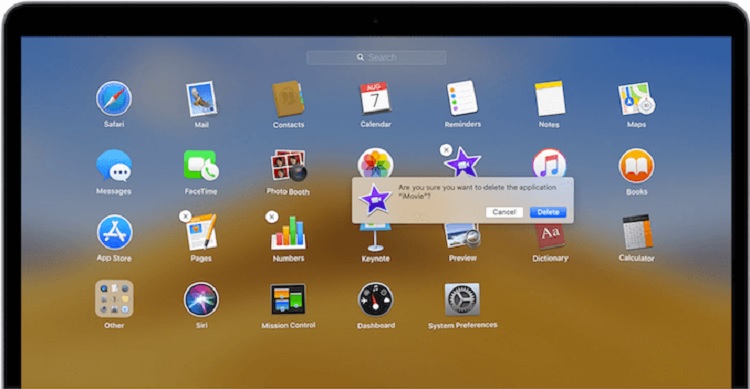
Launchpad is another tool that you can use to trash junk apps.
- Open Launchpad and hold an app’s icon until it starts shaking.
- Click on the ‘x’ symbol beside the app, and it’ll be deleted.
Delete DMG Files
After installing an application, its DMG files are useless. But you’d still have a huge pile of these files that would cost your precious disk space. You can use Finder to delete these items manually or use a tool to do so.
Clear Temporary Files
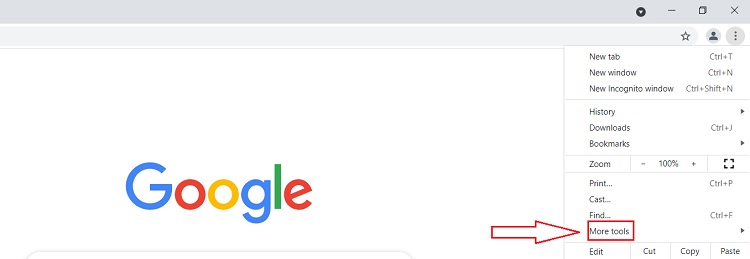
Even though clearing the temporary files won’t increase your device’s speed or efficiency, it’d still clear space in the drive. Browser cache takes up the majority of storage space, so here’s how to clear the cache.
- Click on the three dot icon in the upper right corner of Chrome.
- Select More Tools and click on Clear Browsing Data.
- Choose a time range when you wish for the browsing data to clear.
- Remove the cache images and files as well.
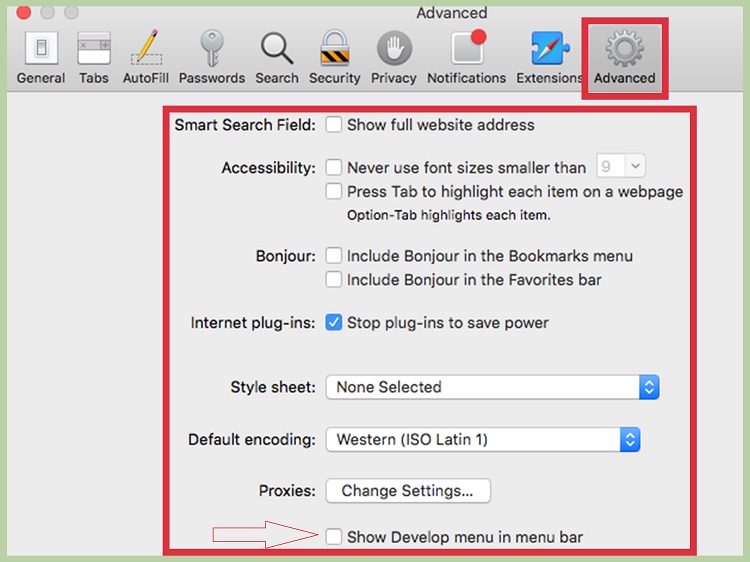
You can remove Safari’s cache in the following way –
- Navigate to Safari > Preferences > Advanced, and then click on the checkbox beside the Show Developer menu under the menu bar.
- Select Develop at the top.
- Click on Empty Cache.
Firefox’s cache can be removed as follows –
- Open the menu and select Preferences.
- Click on the Privacy and Security Panel.
- Choose Clear Data in the Cookies and Site Data tab.

Remove Duplicate Files
You might not notice, but a lot of time, you have two copies of the same files in the device, and there’s no point in that. So deleting those would do no harm and offer you more storage capacity as well. Use the Duplicate File Finder Tool to remove these duplicate files or do so manually.
Reduce Photo Library Size
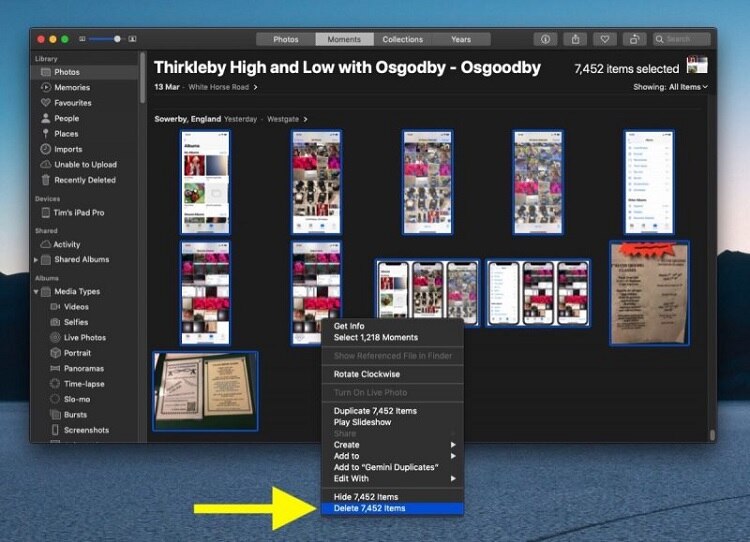
All the photos that you click or add to the device become a part of the Photo Library, but this library can turn out to be huge if you have a lot of photos stored here. It’s a good idea to delete some unnecessary photos from it to create more space. Here’s how to do it –
- Go to the Photos app.
- All the photos are stored in the Library Album. You can select the ones you wish to delete, ctrl-click on them and click on Delete X number of photos.
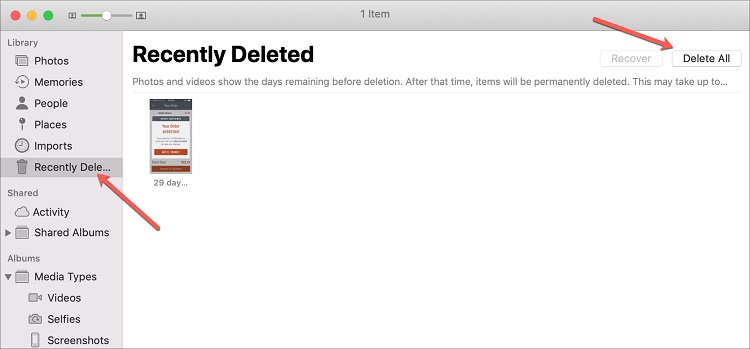
- Now, open the recently deleted album to permanently remove the photos from there and click on Delete.
You can also check the box beside iCloud Photos and click on Optimize Mac Storage, which would allow you to convert high resolution files to low resolution, if you don’t want them to take up a lot of space. You can download these in high res. whenever you want.
Compress Files
Apple has a built-in compression tool that would help you compress files. All you have to do is choose the files you wish to compress, right click on them and click on Compress. The files would be compressed into a zip file, and if you want, you can shift this zip file to an external drive.
Empty Trash
Just deleting files doesn’t remove them from the computer’s storage; it’s essential to permanently delete them from the trash as well; otherwise, they’d still take up space.
- Navigate to the Apple Menu and click About This Mac.
- Select Manage under the Storage Tab.
- Turn on the “Empty Trash Automatically” option.
Delete Unused Language Files
Mac offers more than 180 languages to the users, and they are stored in the localization files that take up at least 1.5 GB of your storage space. Who needs 180 languages, though, right? So it’s better to delete the ones that you don’t use. However, when you do so, all the apps in your device will adopt the macOS language, and you can change the language by reinstalling the app. In the case of Mac’s default apps, you’d have to reinstall macOS itself.
- Navigate to the Applications folder.
- Right-click on an app and select Show Package Contents from the menu.
- Click on the Contents folder and go to the Resources folder.
- In the Resources folder, delete the apps you want ending with .lproj. For English, it ends with en.lproj, and in Spanish, it’d end with es.lproj.
- Now, empty the trash.

Clean Your Desktop
It’s vital to remove junk and unnecessary files, photos, videos, projects, and so on from your desktop because they do contribute a little in reducing free space.
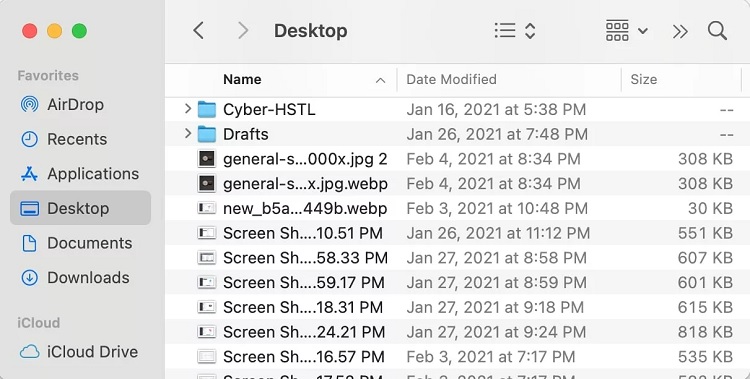
- Open Finder and select Desktop.
- Choose List under the View menu.
- Organize the files based on their size and delete the ones that are large in size.
For those who have macOS Mojave or Later, then you can click anywhere on the desktop screen and click on Stacks in the window that pops up. This would sort the files on your Desktop and reduce clutter. You can choose which one to delete and which to keep.
Delete Mail Attachments and Junk Mail
Emails aren’t the problem when it comes to low storage capacity, but an email with attachments causes trouble because those attachments take up space in your drive or disk whenever you open them. So here’s how to delete them –
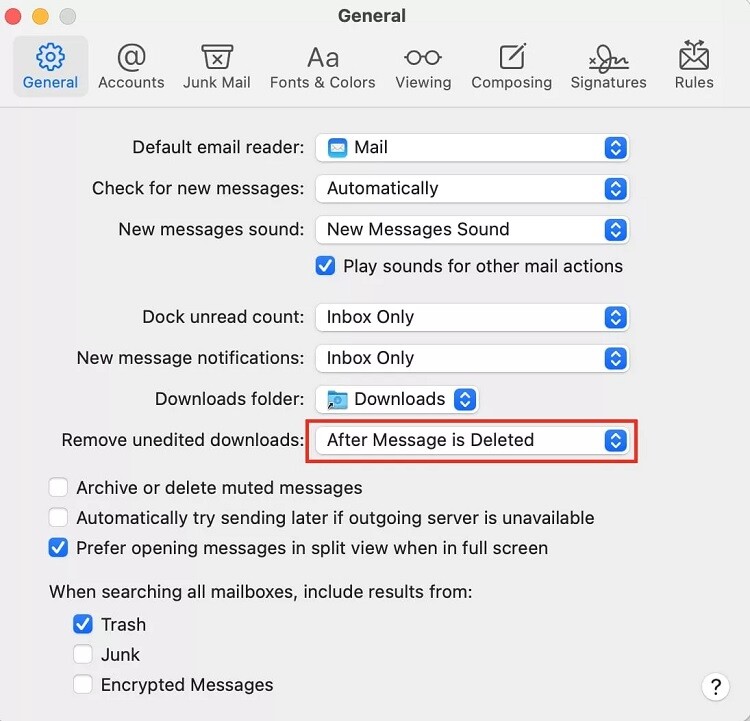
- Go to Preferences in the Mail app.
- Click on the Remove Unedited Downloads option under the General Tab and select the After Message is Deleted option.
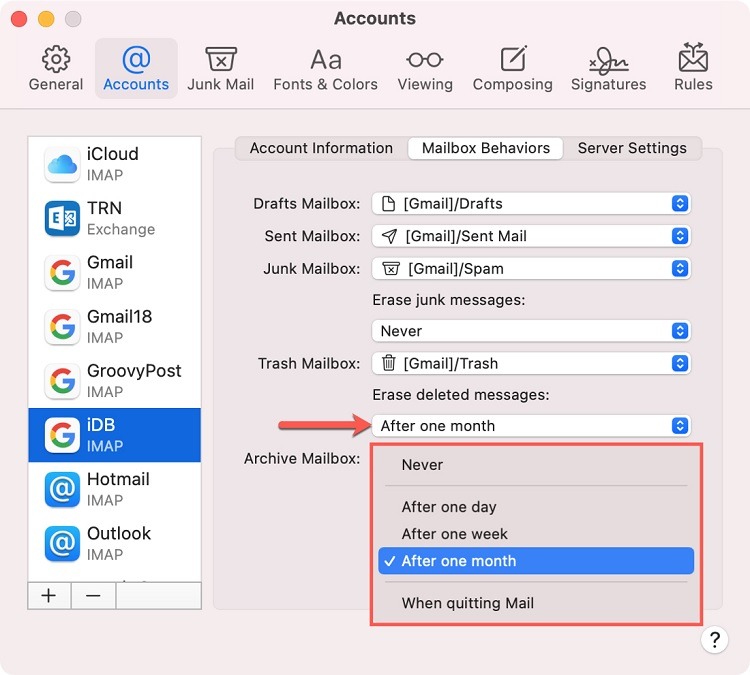
Also, since it’s not possible to do so with regular mail that is important, you can do so with junk mail.
- Navigate to Preferences in the app.
- Click on the Erase Junk Messages under the Accounts tab, and select the After one month option.
Delete Old iOS backups
It’s an excellent practice to back up your files in your iOS, but they shouldn’t be permanently left there; otherwise, they’ll consume precious space. So let’s understand how to go about deleting these files.
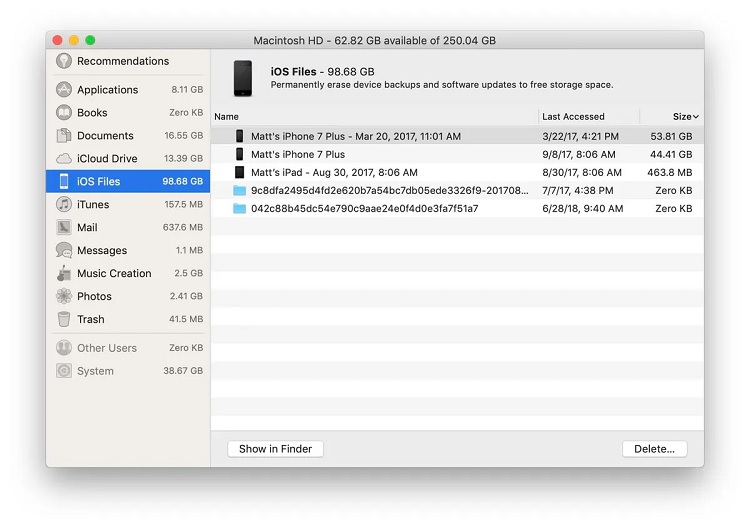
- Navigate to the Apple menu and select About This Mac.
- Click on Manage under the Storage option.
- Select iOS Files in the window that pops up.
- Select the old backups you want to remove and click on Delete.
- Confirm the deletion of files.
Clear the Downloads Folder
When you download an app, its installer file remains in the downloads taking up space, but there’s no use for it.
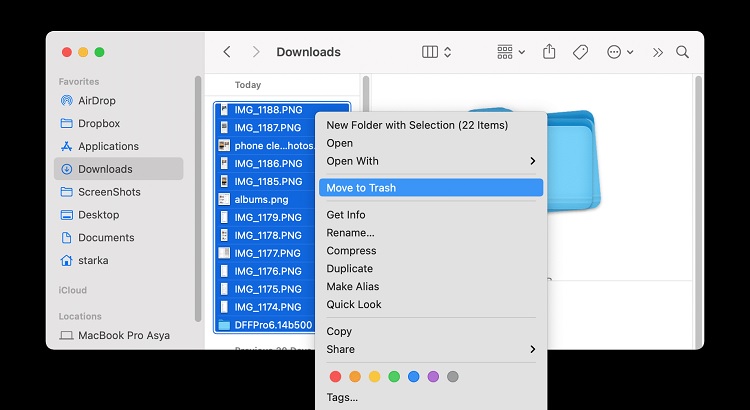
- Click on Finder.
- On the left, select Downloads.
- Right-click on the files you don’t need and click on the Move to Trash option.
- Don’t forget to empty the trash.
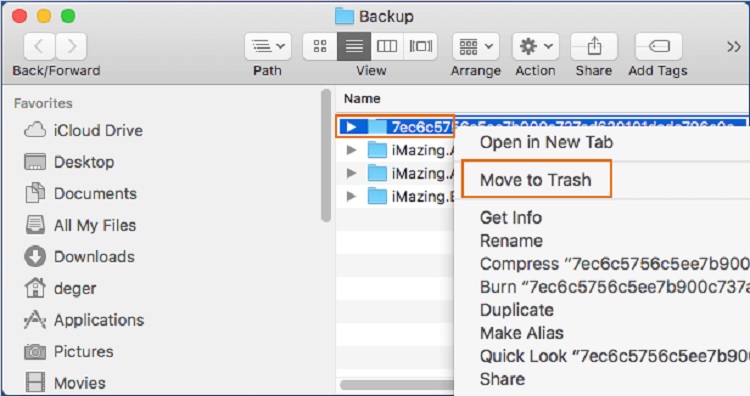
Delete the iTunes Backups
If you’ve backed up your files in iTunes, then you’d be surprised at the amount of storage space it’s taking away from you. To delete them, follow the path below –
~/Library/Application Support/MobileSync/Backup
You’ll come across various folders here with random names, so open these folders and delete the contents in them. Close iTunes before doing so.
Move Photos to External Drive
There’s one last way, which could help you free up space on macbook air or any version of the Mac, and that is to shift your Photo library to an external drive. Here’s how to do it.
- Close the Photos app.
- Copy the entire library to an external drive. It’s better to press the Command key and drag the photos to the drive to move them to the new storage while the original file gets deleted from the Library.
- After the files are moved, press the Option/Alt key when opening the Photos app again.
- Now, select Photos > Preferences and in the General tab, click on Use as a System Photo Library.
- For those who also have the iCloud library enabled on the device, it’d take a little time for your system to understand which photos are stored in the iCloud.
Conclusion
Now, you know all about how to clear space on Mac. We recommend you maintain your device’s efficiency and speed by freeing up space from time to time because deleting so many files and decluttering everything at once could become time taking and full of effort. These methods would undoubtedly help you out whenever you’re running low on storage capacity.


